June 18, 2026
Ever tried making custom NFC stickers—only to end up with blurry prints, dead chips, or designs that just don’t scan? You’re definitely not alone.
For small businesses, creators, and marketers, NFC stickers are incredibly powerful: tap-to-open menus, interactive product labels, smart business cards, and even collectible brand merch. But the printing process can feel tricky because one small mistake can ruin both appearance and functionality.
This guide walks you through everything in a clear, practical way—from choosing the right materials to printing, testing, and troubleshooting—so your NFC stickers actually look good and work perfectly.
Table of Contents
Why Print on NFC Stickers?
Choosing the Right NFC Sticker (This Step Matters More Than You Think)
Printers That Work (And What to Avoid)
Designing Your NFC Sticker (Where Most People Go Wrong)
Step-by-Step Printing Process
Testing Your Finished NFC Stickers
Troubleshooting Common Problems
Quick Final Checklist
Advanced Tips & Creative Ideas
Frequently Asked Questions
1. Why Print on NFC Stickers? <a name=”why-print”></a>
Before diving into the how, let’s quickly cover the why. NFC (Near Field Communication) stickers are passive tags that store small amounts of data—usually a URL, contact info, or a command to trigger an action on a smartphone. When you print on them, you turn a functional chip into a visual tool:
Branding: Add your logo, colors, and instructions (“Tap here to connect”)
User guidance: Visual cues help people know where and how to tap
Professionalism: Blank white stickers look unfinished; printed ones look legit
Differentiation: In a stack of plain tags, your custom design stands out
Whether you’re making 10 stickers for a personal project or 10,000 for a product launch, printing matters.
2. Choosing the Right NFC Sticker (This Step Matters More Than You Think) <a name=”choosing-stickers”></a>
Not all NFC stickers are suitable for printing. Picking the wrong one is the fastest way to waste money. Here’s what you need to know about materials, chip placement, and durability.
Material Matters: PVC, PET, or Paper?
| Material | Durability | Best For | Waterproof? | Scratch Resistant? |
|---|---|---|---|---|
| PVC | High (years) | Outdoor use, coffee shops, shipping labels, high-touch products | ✅ Yes | ✅ Yes |
| PET | Medium-high | Creative branding, bookmarks, phone accessories, minimalist designs | ✅ Yes | ✅ Partial |
| Paper | Low (days/weeks) | Trade shows, temporary promos, event badges | ❌ No | ❌ No |
✔ PVC Stickers (Best for Durability)
PVC is the strongest option. It’s waterproof, tear-resistant, and can survive coffee spills, rain, or constant handling. If you’re making stickers for a café menu, outdoor signage, or products that get passed around, choose PVC.
✔ PET Stickers (Best for Premium Look)
PET is thinner and has a modern, slightly transparent “glass-like” finish. It works beautifully for lifestyle brands, creative merch, or any design where you want a clean, high-end aesthetic. Not as rugged as PVC, but still water-resistant.
✔ Paper Stickers (Best for Budget & Events)
Cheap, simple, and effective—but not durable. Great for one-day events, conference badges, or test runs. Avoid paper for anything that needs to last more than a few weeks.
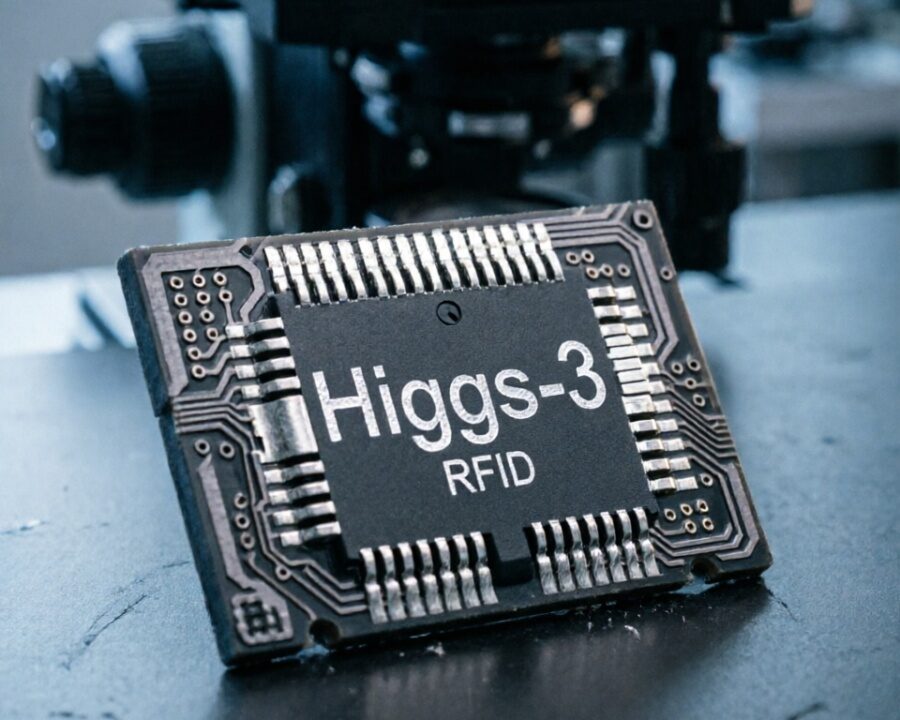
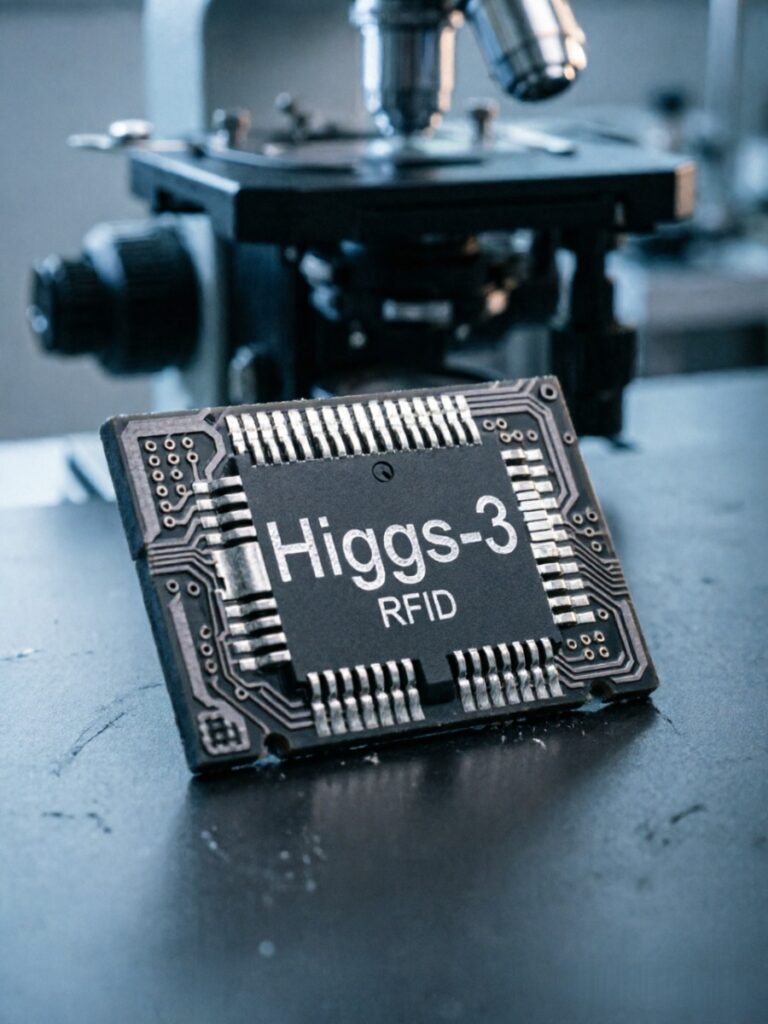
The Most Important Rule: Chip Position Must Be Visible
NFC stickers have two parts: a chip (the tiny black microchip) and an antenna (the copper or aluminum coil surrounding it). If you print over the wrong area, you can block the signal or damage the chip.
Good suppliers always mark the chip zone clearly on the back of the sticker or provide a template. Never print directly on top of the chip area—the pressure from a printer roller or the ink itself can physically damage the chip.
👉 Pro tip: Some NFC sticker suppliers (like TagNFC or GoToTags) provide marked layouts specifically to help you design around the chip. Use them.
What About Adhesive?
For printing, you want permanent adhesive if the sticker will be applied once. Removable adhesive is fine for temporary uses, but it can lift during printing if your printer uses rollers. Stick with permanent unless you have a specific reason not to.
3. Choosing the Right Printer (Don’t Overpay for “Special NFC Printers”) <a name=”printers”></a>
Here’s the truth: You do NOT need a special NFC printer. Any good-quality desktop printer works as long as you use the right settings and materials. That said, inkjet vs. laser matters.
Inkjet Printers (Best for Color Designs)
Inkjets excel at vibrant colors, gradients, and photo-quality graphics. They’re perfect for logos, illustrations, and branding.
Recommended models:
Epson EcoTank series (low cost per print, pigment ink option)
Canon PIXMA series (excellent color accuracy)
Brother MFC-J series (reliable for labels)
Important rule: Use pigment ink, not dye ink.
Pigment ink → waterproof, UV-resistant, won’t smudge when wet
Dye ink → can run or smear with moisture or oily fingers
Think of pigment ink as a “raincoat” for your design. Many EcoTank printers come with pigment black (and sometimes pigment colors). Check your printer’s specs.
Laser Printers (Best for Bulk & Simple Designs)
Laser printers use toner (powder) instead of liquid ink. They’re fast, cheap per page, and great for:
Text labels
Serial numbers or barcodes
Event badges with black text
Recommended: HP LaserJet series, Brother HL-L series
⚠️ But check: Some NFC sticker materials (especially thin PET or paper) can warp under the high heat of a laser printer fuser. Always test a single sheet first. PVC stickers generally handle heat better, but thick materials might jam.
Printer Settings You MUST Adjust
Before printing, dive into your printer’s advanced settings:
| Setting | Recommended Value |
|---|---|
| Paper type | Thick Paper / Label / Cardstock |
| Print quality | High / Best (1200 DPI or higher) |
| Paper size | Match exact sticker dimensions |
| Color management | Let printer manage (or use ICC profile) |
| Margins | Set to “None” or “Borderless” if available |
Small settings = big difference. Running standard “plain paper” mode on a glossy NFC sticker will give you smudges, misalignment, or jams.
4. Designing Your NFC Sticker (Where Most People Go Wrong) <a name=”designing”></a>
Your design must respect the NFC chip area. Here’s how to get it right.
Best Design Tools (Free & Paid)
| Tool | Best For | Price |
|---|---|---|
| Canva | Beginners, quick designs | Free (Pro $12.99/mo) |
| GIMP | Free Photoshop alternative | Free |
| Adobe Illustrator | Professional vector design | $20.99/mo |
| Inkscape | Free vector editor | Free |
| Figma | Collaborative design | Free tier available |
Critical Design Rules
1. Match exact size
If your sticker is 30mm × 30mm, your canvas must be exactly that. Don’t guess or fudge dimensions. Printers are precise.
2. Keep 5mm away from chip area
This is the #1 rule. The chip (usually a small dot or rectangle) and the antenna coil need space. Print over the antenna, and you reduce signal range. Print directly over the chip, and you might break it.
Leave a safe blank zone (no ink, or at least no heavy ink) around the chip. Some designers put a “tap here” icon or a circle that aligns with the chip location, but keep the ink light.
3. Minimum 300 DPI
Low resolution = blurry stickers. Set your design software to 300 DPI (dots per inch) or higher. 600 DPI is even better for small text.
4. Text should be at least 8pt
Smaller text becomes unreadable after printing, especially on textured or glossy surfaces. For instructions like “Tap here,” use 10–12pt.
5. Avoid overly complex gradients
Simple, solid colors print more reliably than fancy fades. Gradients can look banded or pixelated on low-end printers.
6. Use high-contrast backgrounds
If the sticker will be applied to a dark or transparent surface, leave a white or light-colored background. Otherwise, your design becomes invisible.
💡 Pro Tip
Use supplier templates whenever possible. Reputable NFC sticker sellers provide Photoshop, Illustrator, or PDF templates with the chip zone clearly marked. Download these before you start designing.
Sample Design Workflow (Canva)
Create custom dimensions (e.g., 25mm x 25mm)
Set background color or upload logo
Add a subtle circle marking the tap area (keep it light)
Keep all critical text 3–5mm away from the chip zone
Export as PDF (print quality)
Check DPI in export settings (set to 300)
5. Step-by-Step Printing Process <a name=”printing-process”></a>
Now let’s go from design → real sticker. Follow these steps exactly.
Step 1: Export Your File Properly
Use these formats:
PDF (best – preserves vector graphics, fonts, and resolution)
High-resolution JPG (300 DPI, maximum quality)
PNG (if you need transparency, but not recommended for most printers)
Avoid:
Screenshots (72 DPI garbage)
Low-res PNGs (downloaded from web)
Microsoft Word or PowerPoint files
Step 2: Load Stickers Correctly
Use the manual feed tray if your printer has one (bypass tray). This reduces bending.
Load one sheet first for testing. Never load a full stack on your first try.
Make sure the correct side is facing up (printable side). Some NFC stickers have a glossy printable coating; others are matte. If you print on the adhesive side, you’ll ruin the sticker (and possibly your printer).
Pro tip: Run a test page on plain paper first. Cut a piece of plain paper to the same size as your sticker sheet, mark which side is up, and print. Adjust orientation as needed.
Step 3: Adjust Printer Settings (One More Time)
Don’t skip this. Based on your printer model:
Set Paper Type → Thick Paper / Label / Cardstock / Matte Brochure
Set Quality → High / Best / 1200 DPI
Set Size → Exact sticker dimensions or “Same as original”
Disable “Fast Draft” or “Economy Mode” completely
Step 4: Always Print a Sample First
Never skip this step. Print one sticker (or one sheet if your stickers are pre-cut).
Check for:
Alignment – Is the design centered on the sticker? Or shifted off the edge?
Color accuracy – Does red look red? Are skin tones natural?
Chip area safety – Is the chip zone completely free of heavy ink?
Smudging – Run your finger gently over the print after 30 seconds. Does it smear?
If any of these fail, fix your settings or design before batch printing.
Step 5: Batch Printing (But Stay Alert)
Once your sample passes, print in small batches (10–20 sheets at a time). Check regularly for:
Paper jams (thick stickers can curl)
Shifts in alignment (printers can drift after many pages)
Ink quality changes (low ink warnings)
Pro tip: Let each sheet dry completely (2–5 minutes) before stacking. Inkjet prints on glossy surfaces can smear if stacked wet.
6. Testing Your Finished NFC Stickers <a name=”testing”></a>
Printing is not the end—testing is where real quality shows. Even a beautiful print fails if the NFC doesn’t work.
Print Quality Tests
| Test | What to Do | Pass Criteria |
|---|---|---|
| Scratch test | Gently scratch the printed surface with a fingernail | No ink peeling or flaking |
| Water test | Dab a wet finger on the print (PVC/PET only) | No smudging or running |
| Visual check | Hold at arm’s length | Text readable, colors clear |
| Adhesion test | Apply sticker to a clean surface (glass, plastic) | No lifting edges after 1 hour |
NFC Function Tests
Use free apps:
NFC Tools (iOS & Android)
NXP TagInfo (advanced diagnostics)
Trigger (for automation testing)
Test sequence:
Blank scan – Before encoding, can your phone detect the empty tag? (This tests the chip itself.)
Write a URL – Use NFC Tools to write a simple link (e.g., your website).
Tap to open – Hold your phone near the sticker. Does the link open automatically?
Multiple phones – Test on at least 3 different phone models (Android & iPhone). Some phones have smaller NFC antennas.
Range test – How close does the phone need to be? Ideally 2–3cm. If you need to press hard, the antenna may be damaged.
Common Testing Mistakes to Avoid
Testing through a phone case (metal cases block NFC)
Testing with the sticker still on the release liner (peel it off first)
Testing immediately after encoding (give it 10 seconds)
7. Troubleshooting Common Problems <a name=”troubleshooting”></a>
Even with careful preparation, things go wrong. Here’s how to fix them.
❌ NFC Not Working at All
| Possible Cause | Solution |
|---|---|
| Printed directly over chip | Redesign, leave 5mm clearance |
| Printer pressure crushed chip | Use a printer with adjustable roller pressure (or switch to a different printer type) |
| Damaged antenna | Discard that sticker; test another from same batch |
| Wrong side up | Flip the sticker sheet |
| Phone NFC disabled | Turn on NFC in phone settings |
❌ NFC Works, But Range Is Very Short (Need to Touch Exactly)
| Possible Cause | Solution |
|---|---|
| Heavy ink over antenna | Use lighter colors (white/transparent) near the coil |
| Metallic ink | Avoid gold/silver metallic inks—they contain metal particles that block RF signals |
| Sticker applied to metal surface | Metal detunes NFC antennas. Use foam-backed or ferrite tags. |
❌ Blurry or Pixelated Print
| Possible Cause | Solution |
|---|---|
| Low DPI source image | Redesign at 300 DPI minimum |
| Printer set to “draft” mode | Change to “high quality” |
| Wrong paper type setting | Set to “thick paper” or “label” |
| Print head needs cleaning | Run printer cleaning cycle |
❌ Colors Look Wrong (Too Dark, Too Light, or Mismatched)
| Possible Cause | Solution |
|---|---|
| Monitor vs. printer color profiles | Calibrate your monitor. Use manufacturer’s ICC profile. |
| Ink running low | Replace cartridges. |
| Paper type mismatch | NFC sticker coatings vary. Some are matte, some glossy. Adjust accordingly. |
❌ Paper Jams Constantly
| Possible Cause | Solution |
|---|---|
| Using paper tray instead of manual feed | Switch to rear/single-sheet manual feed |
| Thickness setting too low | Set to “envelope” or “heavyweight” |
| Sticker sheet curled | Flatten under a heavy book for an hour |
| Printer not designed for thick media | Consider a dedicated label printer (e.g., Brother QL series) |
8. Quick Final Checklist <a name=”checklist”></a>
Before launching your NFC stickers, run through this checklist:
Pre-Printing
Chip area clearly marked in design
5mm clearance around chip (no heavy ink)
Design dimensions match sticker exactly
Resolution = 300 DPI or higher
Exported as PDF (print quality)
Printer Setup
Pigment ink (inkjet) or compatible toner (laser)
Paper type = Thick / Label
Quality = Best / 1200 DPI
Manual feed tray loaded with ONE sheet
Testing
Sample print successful
Scratch test passed
Water test passed (if applicable)
NFC Tools detects tag
Wrote and read a URL successfully
Works on 3+ different phones
Post-Printing
Stickers peeled cleanly from liner
Applied to intended surface (test one)
No lifting edges after 1 hour
If all boxes are checked—you’re ready.
9. Advanced Tips & Creative Ideas <a name=”advanced”></a>
Once you’ve mastered the basics, here’s how to level up your NFC sticker game.
Creative Uses for Printed NFC Stickers
| Use Case | Design Idea | NFC Action |
|---|---|---|
| Coffee shop loyalty | Bright logo + “Tap to earn points” | Opens loyalty check-in page |
| Product packaging | Minimalist design with hidden “chip zone” mark | Plays unboxing video |
| Business card sticker | Name, title, QR code + “Tap for vCard” | Saves contact directly |
| Museum/gallery label | Artwork thumbnail + “Tap for audio guide” | Plays artist commentary |
| Rental equipment (tools, bikes) | “Scanned? Report damage here” | Opens inspection form |
| Wedding favor tag | Couple’s names + date + “Tap for our playlist” | Opens Spotify playlist |
Advanced Printing Techniques
1. Partial transparency
Leave the chip area completely clear (no ink) and put all design elements around the edge. This looks very high-tech.
2. Two-sided printing
Some NFC stickers have a clear back. You can print on both sides, but only one side is coated for inkjet printing. Use a laser printer for the non-coated side carefully.
3. Spot varnish or laminate
Add a clear laminate sheet over your printed sticker to protect ink from scratches and moisture. This is especially useful for paper NFC stickers.
4. Combine with QR codes
Print a QR code next to the NFC chip area. Not everyone has NFC enabled, but everyone can scan a QR code. Double the usability.
How to Mass-Produce NFC Stickers
If you need 100+ printed NFC stickers, consider professional printing services:
Moo (custom NFC stickers, great quality)
Stickermule (bulk NFC sticker printing)
RFID Inc. (industrial quantities)
For small batches (10–100), doing it yourself with a good inkjet printer is faster and cheaper.
10. Frequently Asked Questions <a name=”faq”></a>
Q1: Can I print on any NFC sticker?
No. Only stickers specifically labeled “printable” or with a printable coating. Blank white NFC stickers are usually printable; clear or metallic ones often are not.
Q2: Will printing damage the NFC chip?
Printing itself (ink/toner) does not damage chips. But the pressure from printer rollers or the heat from a laser fuser can. Always test one sticker first. If you hear crunching sounds, stop immediately.
Q3: Can I print on both sides of an NFC sticker?
Rarely. Most have one printable side and one adhesive side. Some specialty tags (e.g., from NFC.Today) are double-sided printable, but they cost more.
Q4: My ink smudges on glossy NFC stickers. What do I do?
Switch to pigment-based ink. Or spray a clear acrylic sealer (art fixative) lightly over the printed surface. Or use matte finish NFC stickers instead of glossy.
Q5: How do I align the design perfectly with the sticker outline?
Use the exact template from your sticker supplier.
In your printer driver, disable “scale to fit” or “borderless” unless your sticker sheet supports it.
Print registration marks (crop marks) and trim after printing if needed.
Q6: Can I reuse printed NFC stickers?
No. Once applied, the adhesive loses strength. Also, rewriting data doesn’t require reprinting—you can change the NFC action anytime using an NFC writer app.
Q7: What’s the best NFC sticker size for printing?
Common sizes:
25mm (1 inch) – good for small products, phone backs
30mm (1.2 inches) – best balance, fits most designs
40mm (1.6 inches) – easier to print detailed designs
50mm (2 inches) – large “tap here” instructions
For first-timers, start with 30mm round stickers.
Final Thoughts
Printing NFC stickers isn’t complicated once you understand the rules:
Choose the right material – PVC for durability, PET for looks, paper for cheap tests.
Respect the chip area – Keep 5mm clear of heavy ink.
Use correct printer settings – Thick paper, best quality, pigment ink.
Always test before mass printing – One sample sticker saves 100 mistakes.
When done right, NFC stickers become more than labels—they turn into interactive brand experiences that people can literally tap. Whether you’re running a café, building a creative brand, or experimenting with smart packaging, this small piece of tech can make your product feel surprisingly “alive.”
And the best part? Once you get the workflow right, it becomes easy—and even a bit addictive.